Xrev – Revit 2024 support released

Revit 2024 releases for Xrev Transmit and Freebies are now available from our Downloads page. The update has also been submitted to the Autodesk Revit App Store, however it may take a few days until it completes Autodesk’s review process.

Xrev Transmit

This update will upgrade your Xrev Transmit database (XrevTransmit.sdf) file. As such, if you do have multiple users sharing the same settings/history/transmittals then please coordinate the update process. All users should be updated to the new version at the same time.

Posted in Uncategorized | Comments Off on Xrev – Revit 2024 support released

Blog fixed and September 2018 Update

Apologies to those who thought Xrev fell off the map.  We had some issues with the News section of our website which hopefully should now all be resolved and we are going to try a be more regular with our blogging again.

So what’s new?

We are still working away on Transmit version 4 and the many new features it offers with an even more intuitive user interface and workflows.  Stay tuned as hopefully it’s release is just around the corner.  What features would you like to see included?

We are also in the process of rebuilding our website and licensing system, so fingers crossed that’s not too far away either…

We’ve developed some Revit plugins for a number of Australian manufacturers including:

  1. Caroma (although they’ve recently changed their strategies in regards to BIM so have discontinued the Revit plugin)
  2. Knauf (latest version released recently)
  3. Fantech (coming soon)

Our high quality Generic Revit Content suites continue to be used by many companies and we are expanding the libraries to cover more.

We’ve been completing a record number of Revit implementations over the past year helping a number of Architecture and Interior Design firms get going with Revit in the most efficient way, as well as running numerous training courses on Revit, Dynamo and various BIM workflows.

We’ve expanded our team to include a new employee and we are assisting a number of companies with high quality Revit documentation and modelling services.

Posted in News, Services, Training | Tagged , , , , , | Comments Off on Blog fixed and September 2018 Update

Xrev Transmit – 3.2.0

For those paying attention, the other day we officially released version 3.2.0 of Xrev Transmit on our website.

What’s new?

If you’ve seen this error or similar when multiple people run Xrev Transmit:

An unexpected error has occurred and the command could not be completed.
IOException: The process cannot access the file “\\Filepath\XrevTransmit.sdf” because it is being used by another process.

This release is for you.

This release should resolve this database locking issue which was introduced in version 3.0.0, because of an issue in a 3rd party component.  There are couple of changes in this release to reduce the possibility that this occurs.  But if you do see this message with the new build, please let us know!

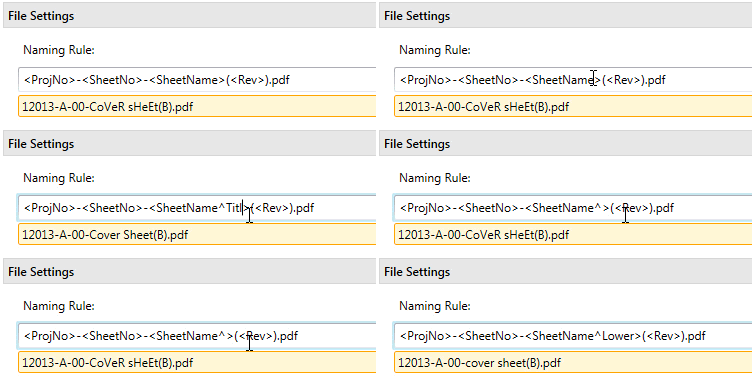
There is also new Naming Rule functionality for Case Conversion.  Details are in our WIKI help

You can now convert the case of Revit parameters in your Naming Rules and Output location fields.

Other changes:

  • Added functionality to hide files in the Aconex wizard.  This is useful if you’ve generated some files and don’t wish to ever publish them to Aconex.  Simply right click and choose Hide. (they can be restored if necessary)
  • Added a Configuration tool to the Windows Start Menu to set the Log Level and easily open the log file location
  • Changed the method in which we load printers, paper sizes and paper sources in the background.  This is useful if you had a Printer Driver that the Revit API doesn’t like.
  • General minor fixes and improvements
Posted in Bug Fixes, New Features | Tagged , , | Comments Off on Xrev Transmit – 3.2.0

Family Creation – Bi-Folding Windows or Doors

Did you ever want to create that single Bi-Folding window or door that could handle every possible configuration?  Well the other day I did…

What is every possible configuration?

  • Obviously Height/Width Control
  • Obviously Position within the Wall
  • Obviously Number of Panels
  • Panels Stacking Left & Panels Stacking Right
  • Single or Double Glazed
  • Sub-Sill and Sub-Head Options
  • Glass Thickness

Bi-Folding Window - 3D Display (Fine)

Bi-Folding Window - Plan Display

Bi-Folding Window - Elevation

In usual fashion I wanted to push Revit beyond its limits.  This is all pretty easy if I simply ignore the hinges as every panel is basically the same.  So of course I want to see the various types of hinges at Fine detail.  So depending on where the panel sits in the configuration, it will effect what type of hinges it has either side.  Enter, some complicated conditional statements.
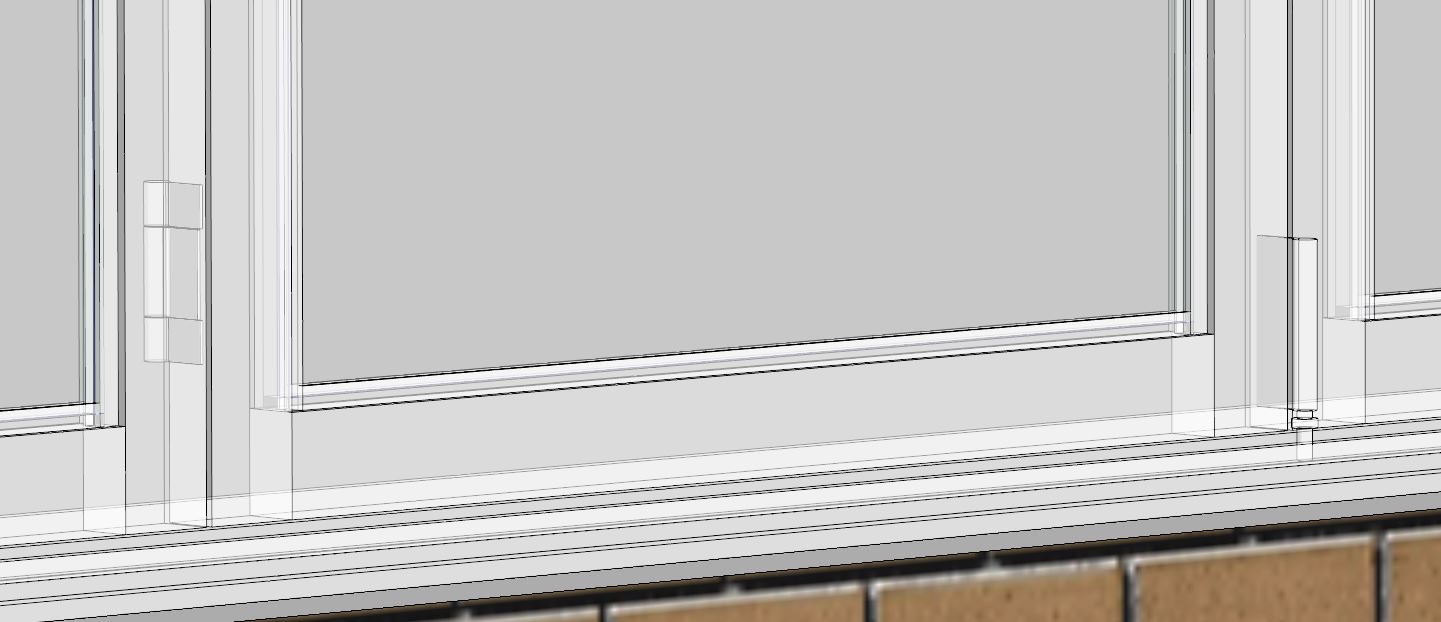
Bi-Folding Window - Hinges

So first step was to create the Panel as a nested Family.  I then modelled up all the hinge options for both the left and right hand side of the panel and connected each option to its own Visibility parameter.  I wanted each option to be mutually exclusive, as I didn’t want to see 2 hinge types on the same side at the same time.  So I connected these visibility parameters conditionally to an Integer parameter (which I’ve explained in previous posts).

With this family created I nest it into the host family, and connect up the Left & Right Hinge Condition parameter to a matching parameter in the host.  Now the tricky part, figuring out the formulas…  If this was software programming it would be a pretty simple task.  But breaking it down to simple conditional statements makes it trickier.  Enter my go to tool, for formulas Notepad++, as it helps you get the brackets correct and I can space things out nicely on new lines.

I established there were 7 potential configurations for each side of the panel:

  1. Left Stacking/Visible/Last
  2. Left Stacking/Visible/Mid
  3. Right Stacking/Visible/First
  4. Right Stacking/Visible/Mid/Even
  5. Right Stacking/Visible/Mid/Odd
  6. Right Stacking/Visible/Last/Even
  7. Right Stacking/Visible/Last/Odd

So how do I translate these into Revit formulas.  Lets analyse Panel 3 from the left (NOTE: I used validation parameters to make sure what the user inputs for Panel Counts is within the accepted range).

Condition 1 = if(Panel Left Stacking Validation=3)

Naturally for Panel 3 to be the last panel in the stack, then the left stacking parameter needs to equal 3.

Condition 2 = if(Panel Left Stacking Validation>3)

Likewise, for Panel 3 to be a mid panel, left stacking must be greater than 3.

Condition 3 = if(and(Panel Count Validation=3,Panel Left Stacking Validation=2))

For Panel 3 to be the first right stacking panel (closest to the right frame).  The only way this can occur is if there are 3 panels in total and 2 of them are stacking left.

Condition 4 (5-7 similar) = if(and(Panel3, Panel Left Stacking Validation<2,(roundup((Panel Count Validation-2)/2)=rounddown((Panel Count Validation-2)/2))))

Now we are getting more complicated.  So obviously Panel 3 needs to be visible, only 2 panels or less can be left stacking, otherwise this would be in the left stacking bunch.  The next part calculates whether this is an even or odd panel.  By taking the total panel count and subtracting one less than the position of this panel, I know what number panel I have from the right.  EG: if there were 7 panels, subtract 2, I know this is the 5th panel from the right.

So now I need to figure odd, is this number odd or even?  This is where roundup/rounddown comes in handy.  In this example if I divide the number by 2, I’d get 2.5, so we simply do one formula that rounds up and one that rounds this number down, if they don’t match then we know that it’s an odd number panel.  If they do match, we know its even.  EG: 4/2 = 2 (its already round, so the rounding parameters will have no effect).

Bundle that all into one formula and there you have it.  Easy right!

Enter Revit frustratingness!  I had some parameters controlling each panels offset from the side.  It seems that when these visibility parameters for the hinges were hooked up, all sorts of weird anomalies/bugs with the position constraints surfaced:
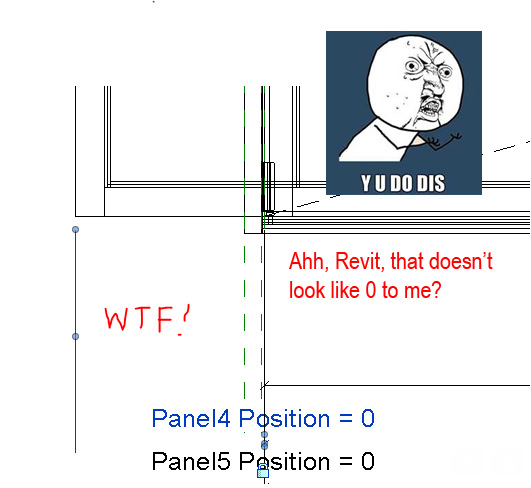
Why you do this?!

Enter 5 hours of me trying to find a workaround/solution for this stupid bug!  Ultimately the solution that worked for me (and this is very much a bug in Revit), was to not have the panels move in the host family.  I added the position offset parameter inside the nested family and hooked things up.  Then the constraints seemed to work again.  This was so frustrating when you think you’ve finished!!

Posted in Family Creation | Tagged , , , | Comments Off on Family Creation – Bi-Folding Windows or Doors

Xrev Transmit – Post Processing Commands

Setting a Post Processing Command to run

This feature has been in Xrev Transmit for a long time.  But we thought we’d highlight some of the awesome ways it can be used!

With the installation we include 3 sample Post Processing Scripts:

  1. Copy Files, to copy the output files (PDF’s, DWG’s etc) to another location, perhaps an FTP Site, or perhaps you keep all the documents ordered by date, and then a duplicate in one folder for convenience…
  2. Delete PCP Files, to delete the little used PCP files that Revit outputs when generating a DWG.
  3. Run AutoCAD Script, to open up each of the AutoCAD files and run a script on them.  This can do anything from purging out some of the garbage from the file, or deleting the titleblock and putting a preliminary stamp on the sheet, or even substituting TrueType Fonts with SHX Fonts.

Other examples of how our customers have used this feature:

Maintaining a Current Issue Folder

Let’s say by default you output each issue into its own date specific folder with a description <Date>-<Issue Name>.  But for convenience you also wish to maintain a “Current Issue” folder in another location that just has the most recent revision of all the sheets issued, and old drawings are placed in a “Superseded” folder.  Xrev Transmit can do this for you!

Substituting Illegal Characters

Sometimes you want to have the Sheet Issue Date, output in the file name.  But if your Revit parameter uses forward slashes as the separators, these are illegal characters in a file name.  Xrev Transmit automatically substitutes these with Percentage encoding %2F.  A script could be written to automatically find the particular percentage codes in file names, and replace it with a particular character.  (NOTE: Modifying the file name or path in this way will mean Xrev Transmit will be unable to find the file for uploading to sites like Aconex).

Truncating Parameter Values

Perhaps you output with the Sheet Name in the file name, but would only like it to output the first 12 characters of the Sheet Name.  A script could be written to remove the unwanted characters.  (NOTE: Modifying the file name or path in this way will mean Xrev Transmit will be unable to find the file for uploading to sites like Aconex).

If you have any other ideas we’d love to hear them!

Posted in News | Tagged , | Comments Off on Xrev Transmit – Post Processing Commands

Print/Exporting PDFs and other formats from Revit

There are 8 main ways Revit users Print & Export their deliverables from Autodesk Revit.  Each requires varying degrees of your time to complete.  This post serves to explain how Xrev Transmit could potentially improve upon your current process to Print/Export PDF’s, DWG’s, DWF’s or any of the other formats supported by Autodesk Revit.

1. Completely Manually

You use the manual file name options of PDF or DWG, and when prompted by Revit you input the desired file name and choose Save.  If printing 100 sheets you’d have to this 100 times, but it does ensure the file is called exactly what you want.

PROS of Xrev Transmit over this approach:

  • No prompts for file names, as they are already configured to your own naming conventions
  • Simultaneously output multiple formats
  • The user interface of Xrev Transmit, is more intuitive in terms of being able to select the sheets you wish to print.
  • No ongoing user interaction required.  Queue it up, and work on something else in the meantime.
  • No manual naming of files, so no chance of human error

2. Combined Sets for PDF’s

You print PDF’s to a single combined set and set the file name when prompted by your PDF printer.

PROS of Xrev Transmit over this approach:

  • Simultaneously output multiple formats, not just PDF’s
  • The user interface of Xrev Transmit, is more intuitive in terms of being able to select the sheets you wish to print.

3. Semi-Automatic, where the Revit automatic file names are acceptable

For PDF’s, the Sheet Name and for DWG’s the Automatic – Long or Automatic – Short (Sheet Number) is acceptable.  Provided you are using a compatible PDF printer, you receive no file name prompts.

PROS of Xrev Transmit over this approach:

  • Simultaneously output multiple formats, not just PDF’s
  • The user interface of Xrev Transmit, is more intuitive in terms of being able to select the sheets you wish to print.

4. Semi-Automatic, where the Revit automatic file names are acceptable, but your PDF writer still prompts for a file name

For PDF’s, the Sheet Name and for DWG’s the Automatic – Long or Automatic – Short (Sheet Number) is acceptable.  You still have to dismiss all the file save as dialogs for each sheet for your PDF printer.

PROS of Xrev Transmit over this approach:

  • Simultaneously output multiple formats, not just PDF’s
  • The user interface of Xrev Transmit, is more intuitive in terms of being able to select the sheets you wish to print.
  • No prompts for file names, as they are already configured to your own naming conventions
  • No ongoing user interaction required.  Queue it up, and work on something else in the meantime.

5. Semi-Automatic, where the Revit automatic file names are unacceptable

Required Naming Convention

You first print your PDF’s and DWG’s using the automatic Revit file naming options, then afterwards go back and manually rename all the files to the desired naming convention.

PROS of Xrev Transmit over this approach:

  • Simultaneously output multiple formats, not just PDF’s
  • The user interface of Xrev Transmit, is more intuitive in terms of being able to select the sheets you wish to print.
  • No prompts for file names, as they are already configured to your own naming conventions
  • No ongoing user interaction required.  Queue it up, and work on something else in the meantime.
  • No manual naming of files, so no chance of human error

6. Semi-Automatic, where the Revit automatic file names are unacceptable and the Revision is not required in the file name or all the Revisions are the same for each sheet

You first print your PDF’s and DWG’s using the automatic Revit file naming options, then use a 3rd party file renaming utility to batch rename all the outputted files from Revit to the desired convention.

PROS of Xrev Transmit over this approach:

  • Simultaneously output multiple formats, not just PDF’s
  • The user interface of Xrev Transmit, is more intuitive in terms of being able to select the sheets you wish to print.
  • No need to go back afterwards and modify the files
  • No need to purchase any additional software
  • File names can make use of any Revit parameter, not just the ones Revit outputs in its automatic naming.

7. Semi-Automatic, where the Revit automatic file names are unacceptable and the Revision is required in the file name.

You first print your PDF’s and DWG’s using the automatic Revit file naming options, then maintain a Sheet List Schedule in Revit that contains your Sheet revisions, and export this out as a CSV, then use a 3rd party file renaming utility that can make use of the export, in order to batch rename all the outputted files from Revit to the desired convention.

PROS of Xrev Transmit over this approach:

  • Simultaneously output multiple formats, not just PDF’s
  • The user interface of Xrev Transmit, is more intuitive in terms of being able to select the sheets you wish to print.
  • No need to go back afterwards and modify the files
  • No need to purchase any additional software
  • File names can make use of any Revit parameter, not just the ones Revit outputs in its automatic naming.
  • No need to perform any magic exporting schedules and teaching your renaming utility to read from it…

8. Automatic, using an API tool like Xrev Transmit

Select your Sheets, Select your desired formats including hard copies and have them output automatically with the correct file name and location.

If you need, you can do advanced tasks with Xrev Transmit such as:

  • Publishing files to Aconex
  • Generating a Per Issue or Full History Transmittal
  • Automatically detect the Paper size of your sheets
  • Upload to an FTP
  • Run scripts on DWG files
  • Maintain a Current and Superseded folder automatically, so the full set is always complete and current.


Posted in Uncategorized | Tagged , , | Comments Off on Print/Exporting PDFs and other formats from Revit

New Build – Xrev Transmit

A new build of Xrev Transmit (2.5.11) will be uploaded to our website shortly (if not already).  Whilst we still include BioPDF, which is a commercial grade PDF writer.  We now offer official support for alternative PDF Writers as we understand some companies have already invested in a commercial PDF writer and would prefer to use that.  We now support silent printing and customisable automatic naming to:

  • Adobe PDF
  • Bluebeam PDF
  • PDF Creator

For those that requested PDF Xchange, we did try, but unfortunately it wasn’t possible without a very significant time investment and purchasing access to their SDK.

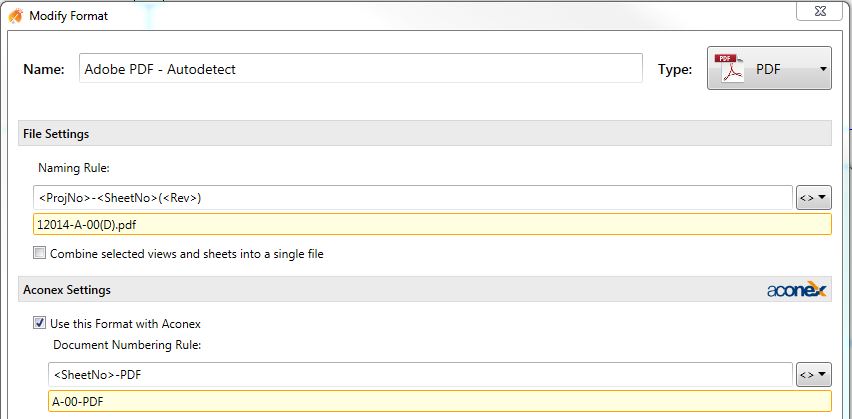
We’ve also listened to all those using our Aconex integration.  The Aconex Document Number can now be configured using the same user friendly naming rules of other parts of our product.  If there are certain formats you don’t want to publish to Aconex you can now filter these out in the Format Settings, by deselecting “Use this format with Aconex”:

Aconex Flag & Naming Rule

Finally, we’ve resolved another potential scenario where you may receive an error “Unable to save PrintSetting” the first time you go to use Xrev Transmit each session.

Comment and let us know what we should be working on next, or if you have any issues with this latest update!

Posted in New Features, New Release | Tagged , | 3 Comments

Xrev Generic Content now available online

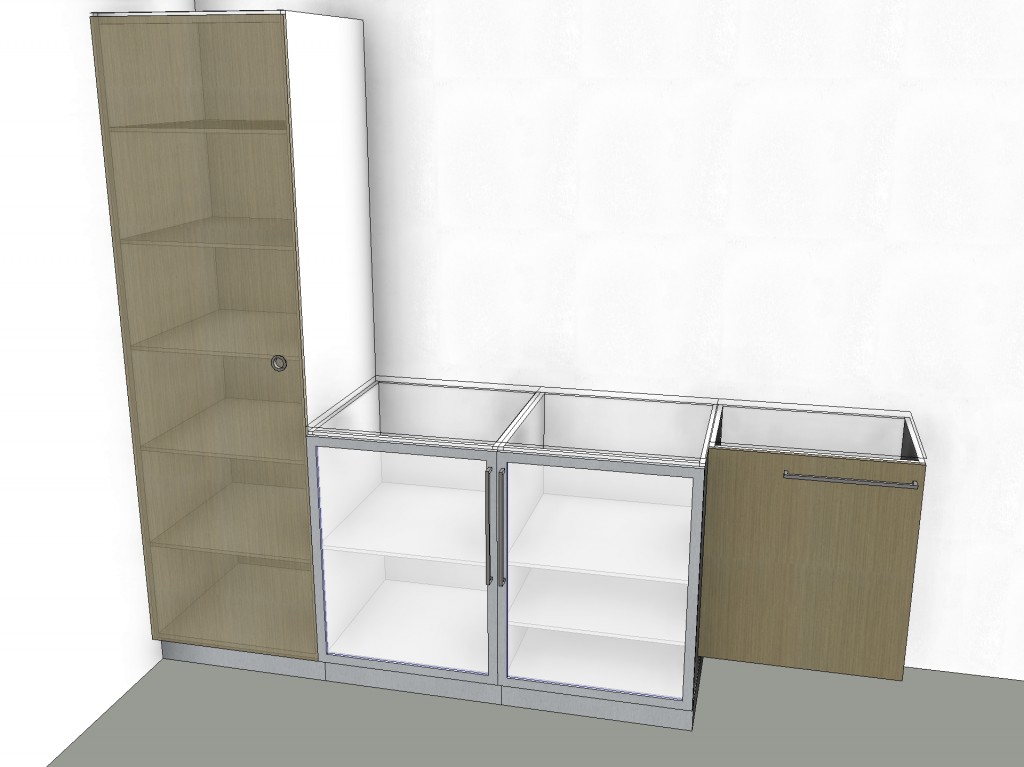
You can now access high quality, Xrev created Generic Content Families via Design Content.  Follow the below links to see previews of the content and their full list of features.

Cupboard - 1 Door (Myriad of Options)

The current list includes:

Feedback is welcomed!  Similar let us know if you have any particular requests…

Posted in Family Creation | Tagged , , | Comments Off on Xrev Generic Content now available online

Family Creation – Sunshading System

I was recently asked to develop a sample family for a manufacturer’s sunshading system.

Requirements:

  • Adjustable Height/Length/Number of Blades
  • Maximum Span
  • Blade Rotation (within a given range)
  • Optional Electronic Mechanical Operation
  • Standoff Distance & Bracket Size/Position control
  • Material Options, include perforations
  • Ability to host vertically, horizontally or on an angle

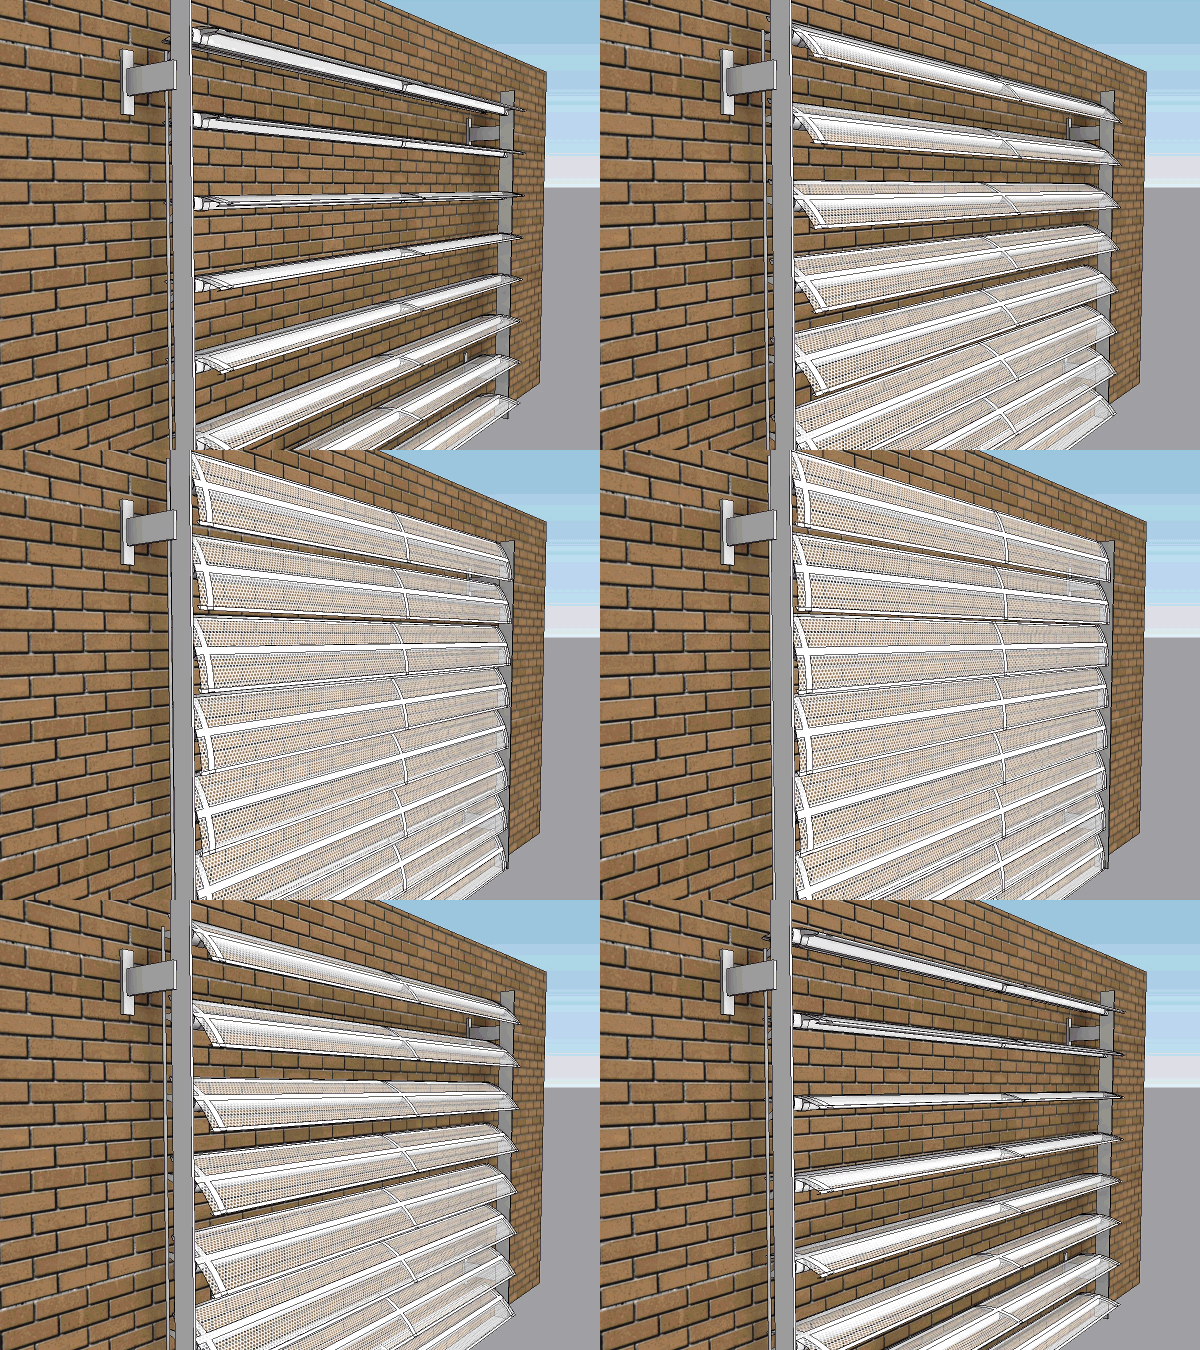
Sunshading System Family

As we are talking parametric arrays, naturally we are best to use nested families.  Also, I wanted to be able to rotate the blades, so what family has a built-in rotation parameter?  A profile…  As such, the first step was to create profiles for all the Blade parts.  This included the main body, the edges (this was separated as I wanted to make it perforated and didn’t want the edges to be perforated), the main support bar, the brackets and the swing arm.  By doing it this way I could avoid any complicated constraints on the profiles.

Next step, was to compile all these profiles together to create a family for the “individual blades”.  This is where I linked up the Sweep->Profile->Angle parameter.  Setup a length parameter and constrained the sweep to the appropriate Reference Planes.  I made sure that the points where I wanted to constrain the blade in the host family, were all “named references” for maximum reliability.

Finally, I had to host these into a Face Based Family where I setup the array, constrained the 2 defining elements in the array (in this case 1st & 2nd) in all 3 Axis and linked through the material and angle parameters from the nested family.  The tricky part was then adding in the formulas to control the position of the control arm, so it moved with the rotation of the blades.  This was just a bit of trig…  I then passed all this through a series of validation parameters to ensure what the user inputs is validated within the minimum/maximum values as we don’t want the control arm conflicting with the structure.  The hydraulic mechanism (not shown), for electronic operation I setup with a visibility parameter to display and constrained it to the same references as the control arm, but with its own pivot.

Overall this family was relatively simple to create, and I was able to “throw it together” in under an hour.  Final family size, a respectable 550KB in Revit 2014.

Posted in Family Creation | Tagged , , , | 8 Comments

RTC Australasia 2014 – Family Creation Overdrive

As you may know, RTC is fast approaching and begins at the end of the month in Melbourne.  As always, I will be running a LAB.  This time on Family creation and aiming at covering examples for MEP, Structural and Architectural families..


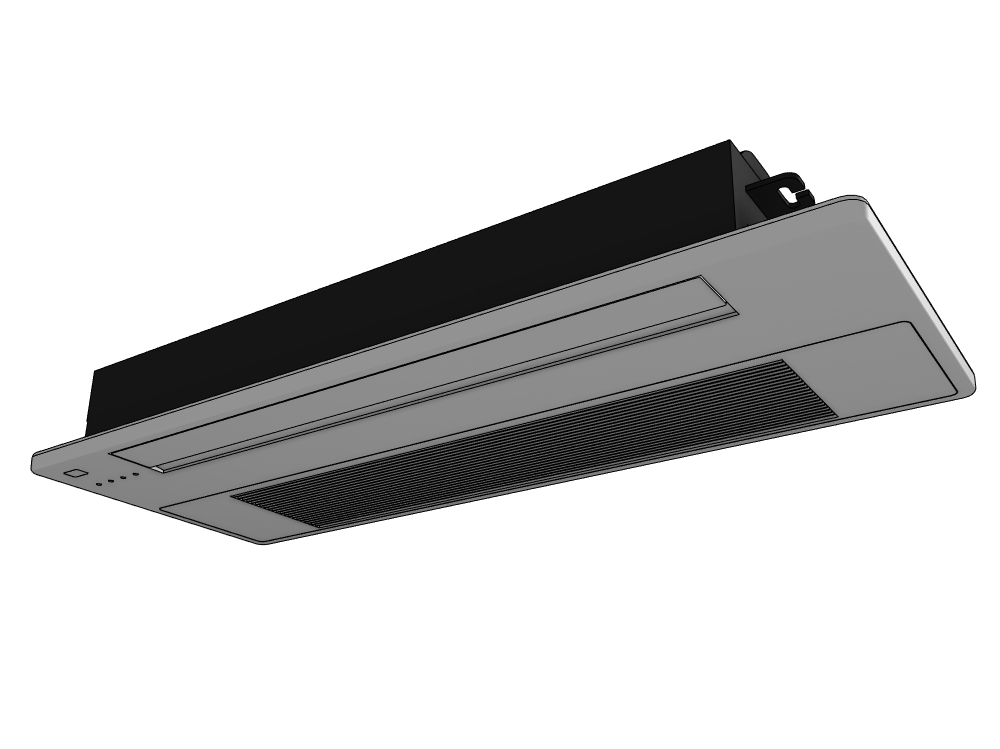
Manufacturer Ceiling Cassette A/C

I love to get feedback prior to these classes so what we cover is what you are expecting and the attendees get the maximum out of it.  As this is only a 75 minute lab including question time, we aren’t going to have the time to go through the creation of families from start to finish.  Instead we’ll be finishing off some families I’ve already pieced together, including:

  • Round Duct Tee Fitting – looking at using integers to drive geometry, but we’ll also look at how this family uses some pretty tricky trigonometry to ensure the fitting is centralised regardless of the angle.
  • Structural Purlin – Symbolic Line offset in plan to more clearly display lapping of beams.  Here we’ll use a Yes/No parameter to drive the offset
  • Window family, that essentially is a curtain wall replacement family, so it can be more easily scheduled.  In this I’ll show you how we can use a Yes/No parameter to make the mullions equally spaced, whilst still allowing the user to specify the mullion exact spacing if they want.  We’ll also look at how we can have any panel be a fixed, casement or awning window.
  • Providing time doesn’t get away from us, we’ll look at some manufacturer content and how we can specific a voltage range in a family, and ensure its always within this range.  Generating Polynomial equations using excel to assist in simplifying your Revit formulas.  Locking down all parameters that the end user shouldn’t be messing with, to make it easier to use and unbreakable.

With everything we do there will be a focus on using ANZRS along with looking at some of the new Revit 2015 family stuff such as parameter sorting and tooltips.

If there are some alternative suggestions you’d like to make, then now is the time!  But note I have to have these handouts completed by Thursday so let me know quick!

Posted in Services, Training | Tagged , , , | Comments Off on RTC Australasia 2014 – Family Creation Overdrive